
Flutter
【Flutter】BottomNavigationBarを使い、アプリの下部にナビゲーションを設置する
作成日:2022年03月23日
更新日:2022年03月23日
アプリの下部にナビゲーションを設定するには、BottomNavigationBar を使います。
まずは、ナビゲーションによって切り替わる画面を簡単に作成します。
dart
import 'package:flutter/material.dart';
void main() {
runApp(const MyApp());
}
class MyApp extends StatelessWidget {
const MyApp({Key? key}) : super(key: key);
Widget build(BuildContext context) {
return const MaterialApp(
home: MyHomePage(),
);
}
}
class MyHomePage extends StatefulWidget {
const MyHomePage({Key? key}) : super(key: key);
State<MyHomePage> createState() => _MyHomePageState();
}
class _MyHomePageState extends State<MyHomePage> {
static const List<Widget> _pages = <Widget>[
Text('Home'),
Text('Settings'),
Text('Account'),
];
int _selectedValue = 0;
Widget build(BuildContext context) {
return Scaffold(
body: Center(
child: _pages.elementAt(_selectedValue),
),
);
}
}
ScaffoldにbottomNavigationBarを設定します。
bottomNavigationBarには、BottomNavigationBarを指定します。
dart
Widget build(BuildContext context) {
return Scaffold(
body: Center(
child: _pages.elementAt(_selectedValue),
),
bottomNavigationBar: BottomNavigationBar(),
);
}
BottomNavigationBarにBottomNavigationBarItemでナビゲーションボタンを設定します。
dart
bottomNavigationBar: BottomNavigationBar(
items: const <BottomNavigationBarItem>[
BottomNavigationBarItem(
icon: Icon(Icons.home_rounded), label: "HOME"),
BottomNavigationBarItem(
icon: Icon(Icons.settings_rounded), label: "SETTINGS"),
BottomNavigationBarItem(
icon: Icon(Icons.person_rounded), label: "ACCOUNT"),
],
),
背景を白にしましょう。
dart
bottomNavigationBar: BottomNavigationBar(
backgroundColor: Colors.white,
items: const <BottomNavigationBarItem>[
BottomNavigationBarItem(
icon: Icon(Icons.home_rounded), label: "HOME"),
BottomNavigationBarItem(
icon: Icon(Icons.settings_rounded), label: "SETTINGS"),
BottomNavigationBarItem(
icon: Icon(Icons.person_rounded), label: "ACCOUNT"),
],
),
現在、どのナビゲーションに該当しているか、currentIndexで指定します。
dart
bottomNavigationBar: BottomNavigationBar(
backgroundColor: Colors.white,
items: const <BottomNavigationBarItem>[
BottomNavigationBarItem(
icon: Icon(Icons.home_rounded), label: "HOME"),
BottomNavigationBarItem(
icon: Icon(Icons.settings_rounded), label: "SETTINGS"),
BottomNavigationBarItem(
icon: Icon(Icons.person_rounded), label: "ACCOUNT"),
],
currentIndex: _selectedValue,
),
ボタンをタップすると切り替わるように、onTapを設定します。
動作は、_selectedValueをボタンを押した場所のindexに上書きするようにします。
dart
void _onTapped(int index) {
setState(() {
_selectedValue = index;
});
}
Widget build(BuildContext context) {
return Scaffold(
body: Center(
child: _pages.elementAt(_selectedValue),
),
bottomNavigationBar: BottomNavigationBar(
backgroundColor: Colors.white,
items: const <BottomNavigationBarItem>[
BottomNavigationBarItem(
icon: Icon(Icons.home_rounded), label: "HOME"),
BottomNavigationBarItem(
icon: Icon(Icons.settings_rounded), label: "SETTINGS"),
BottomNavigationBarItem(
icon: Icon(Icons.person_rounded), label: "ACCOUNT"),
],
currentIndex: _selectedValue,
onTap: _onTapped,
),
);
}
一通り完成したので、動作確認します。
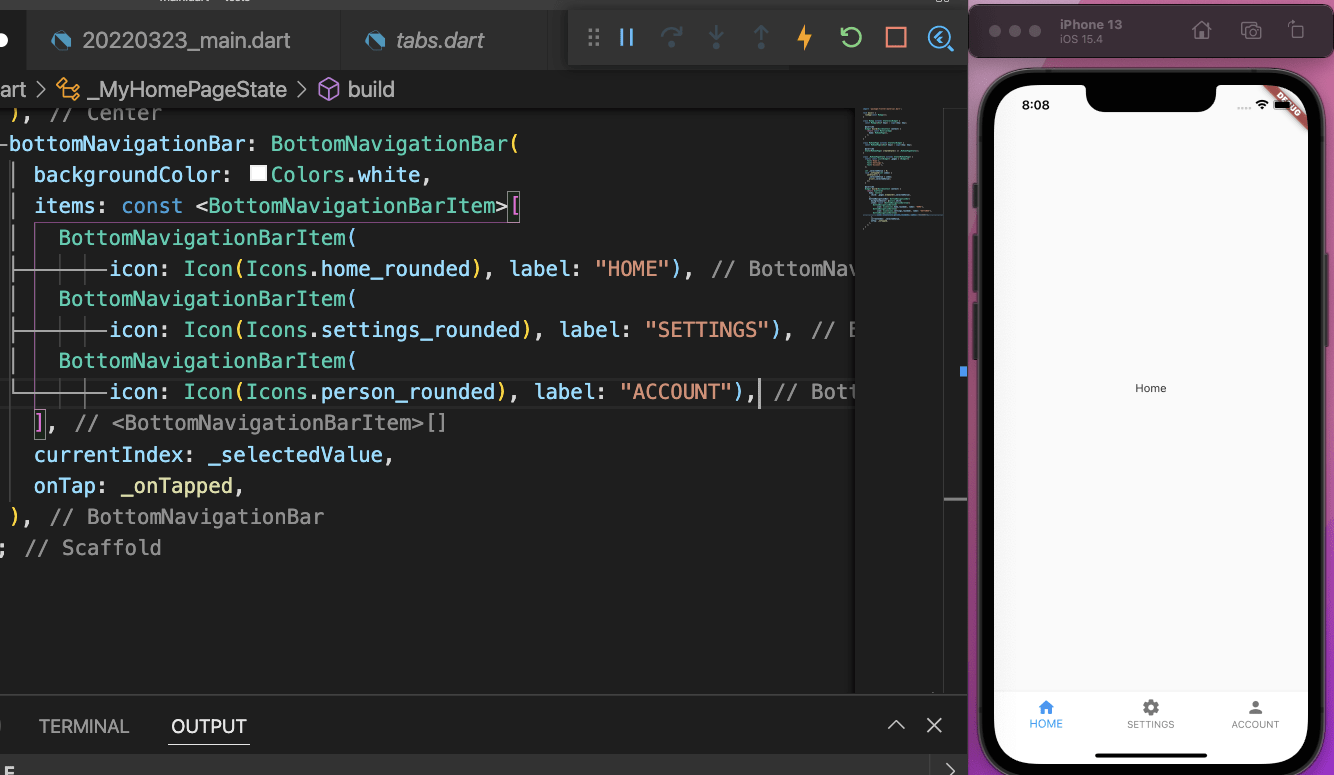
SETTINGS のアイコンをタップすると、
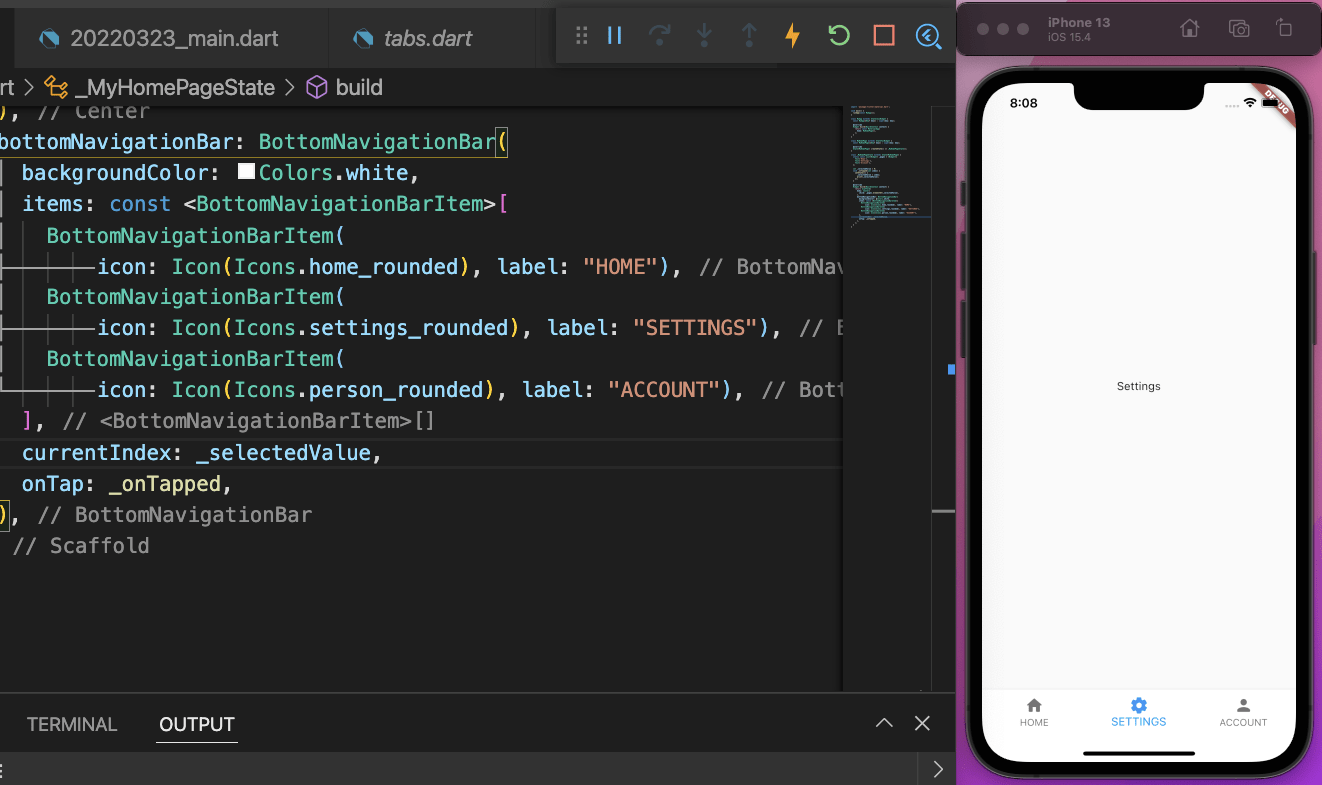
Settings 画面になり、アイコンの色も変わりました。
ACCOUNT をタップしてみましょう。
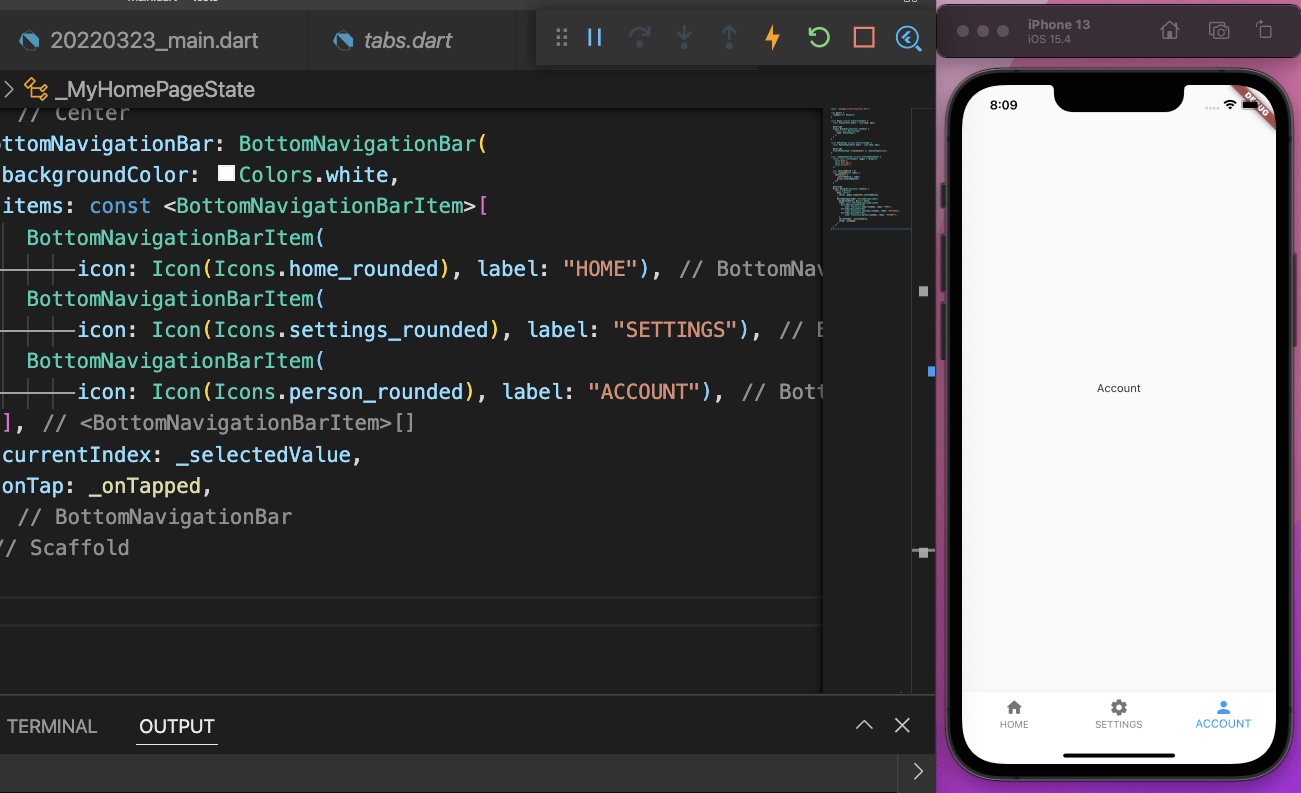
Account 画面に切り替わることができました。
お知らせ
私事ですが、Udemyで初心者を対象にしたReactの動画コースを作成しました。
Reactについて興味がありましたら、ぜひ下のリンクからアクセスしてください。
詳しくはこちら(Udemyの外部サイトへ遷移します)