JavaScript
【JavaScript】fetchを使ってAPIを呼び出す方法
作成日:2021年10月02日
更新日:2021年10月02日
前回は、XMLHttpRequestを使用して、API を取得できるようにしました。
【JavaScript】APIを呼び出す方法
今回は、fetchを使用して、前回使用した API を取得してみます。
まずは、getData関数を作成します。
js
const getData = function () {};
fetchを使って、API を取得します。
js
const getData = function () {
fetch("https://dog.ceo/api/breeds/image/random")
});
};
今のままでは何も処理されないので、thenを使ってどのような処理をするか書きます。
js
const getData = function () {
fetch("https://dog.ceo/api/breeds/image/random").then((res) => {
console.log(res);
});
};
getData();で関数を実行してみます。
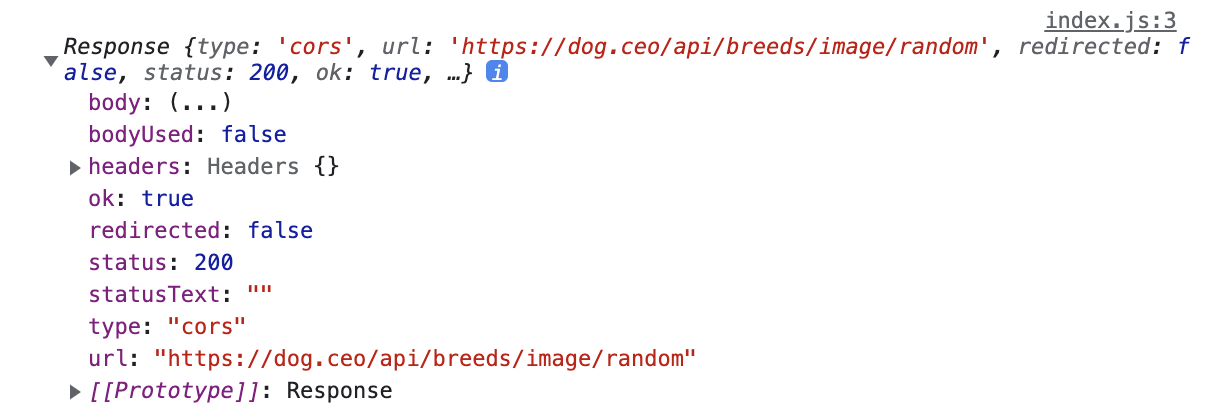
API を呼び出すことができました。
データを使えるようにするため、JSON を呼び出します。
js
const getData = function () {
fetch("https://dog.ceo/api/breeds/image/random").then((res) => {
console.log(res.json());
});
};
getData();
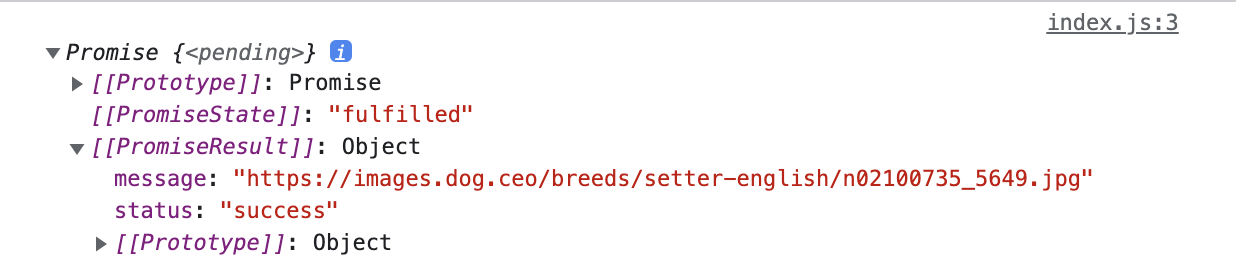
さらに、JSON データを呼び出してみます。
js
const getData = function () {
fetch("https://dog.ceo/api/breeds/image/random")
.then((res) => res.json())
.then((apiData) => console.log(apiData));
};
getData();

JSON データを呼び出すことができました。
最後に、message の URL を使って、ブラウザに犬の画像を表示させてみます。
js
let img = document.getElementById("image");
const getData = function () {
fetch("https://dog.ceo/api/breeds/image/random")
.then((res) => res.json())
.then((apiData) => (img.src = apiData.message));
};
getData();
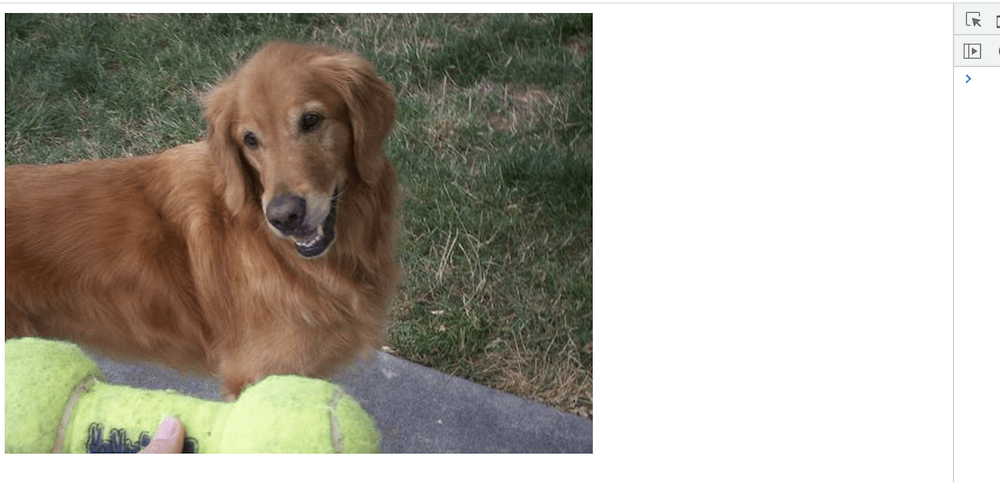
犬の画像が表示されました。
お知らせ
私事ですが、Udemyで初心者を対象にしたReactの動画コースを作成しました。
Reactについて興味がありましたら、ぜひ下のリンクからアクセスしてください。
詳しくはこちら(Udemyの外部サイトへ遷移します)