【AWS】フォームで送信したユーザー情報を、Amazon Cognitoでユーザー認証する
前回は、Amazon Cognito から送られてきた確認コードを確認済みにしました。
【AWS】Amazon Cognitoの確認コード用のフォームを作成する
今回は、フォームで送信したユーザー情報を、Amazon Cognito でユーザー認証します。
まずは、Login.jsx を作成するために、ユーザー登録時に作成したコードをコピーします。
SignUpをLoginへ修正しましょう。
UsernameとPasswordを設定する、authenticationDataを作成します。
AmazonCognitoIdentityのAuthenticationDetailsでauthenticationDetailsを作成します。
dataEmailとattributeEmailを削除します。
UsernameとPoolを設定する、userDataを作成します。
AmazonCognitoIdentityのCognitoUserで、cognitoUserを作成します。
handleSubmit内で、cognitoUserのauthenticateUserを使用します。
認証が成功した場合と、失敗した場合を設定します。
失敗した場合は、エラーを返すようにします。
result から、トークンを取得します。
AWS の SDK を利用するために、ターミナルでnpm install --save aws-sdk を実行し、インストールします。
regionを設定します。
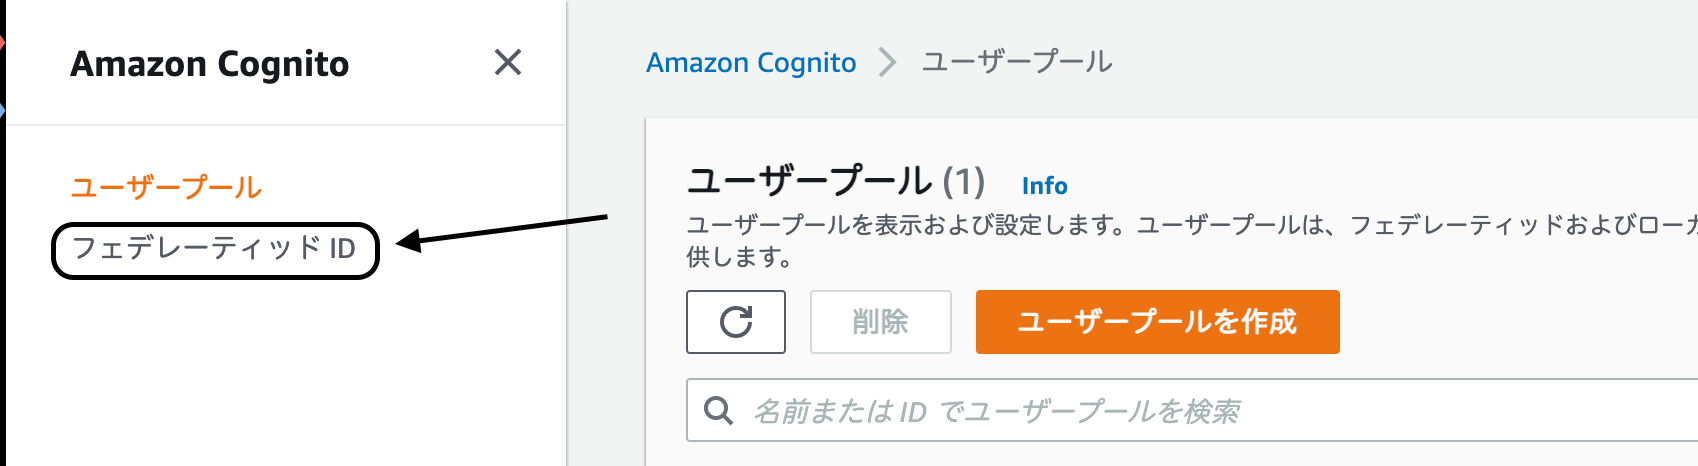
Cognito のフェデレーティッド ID が必要になるので、Amazon Cognito サービスへアクセスします。
ダッシュボードの『フェデレーティッド ID』をクリックします。
ID プール名を入力します。
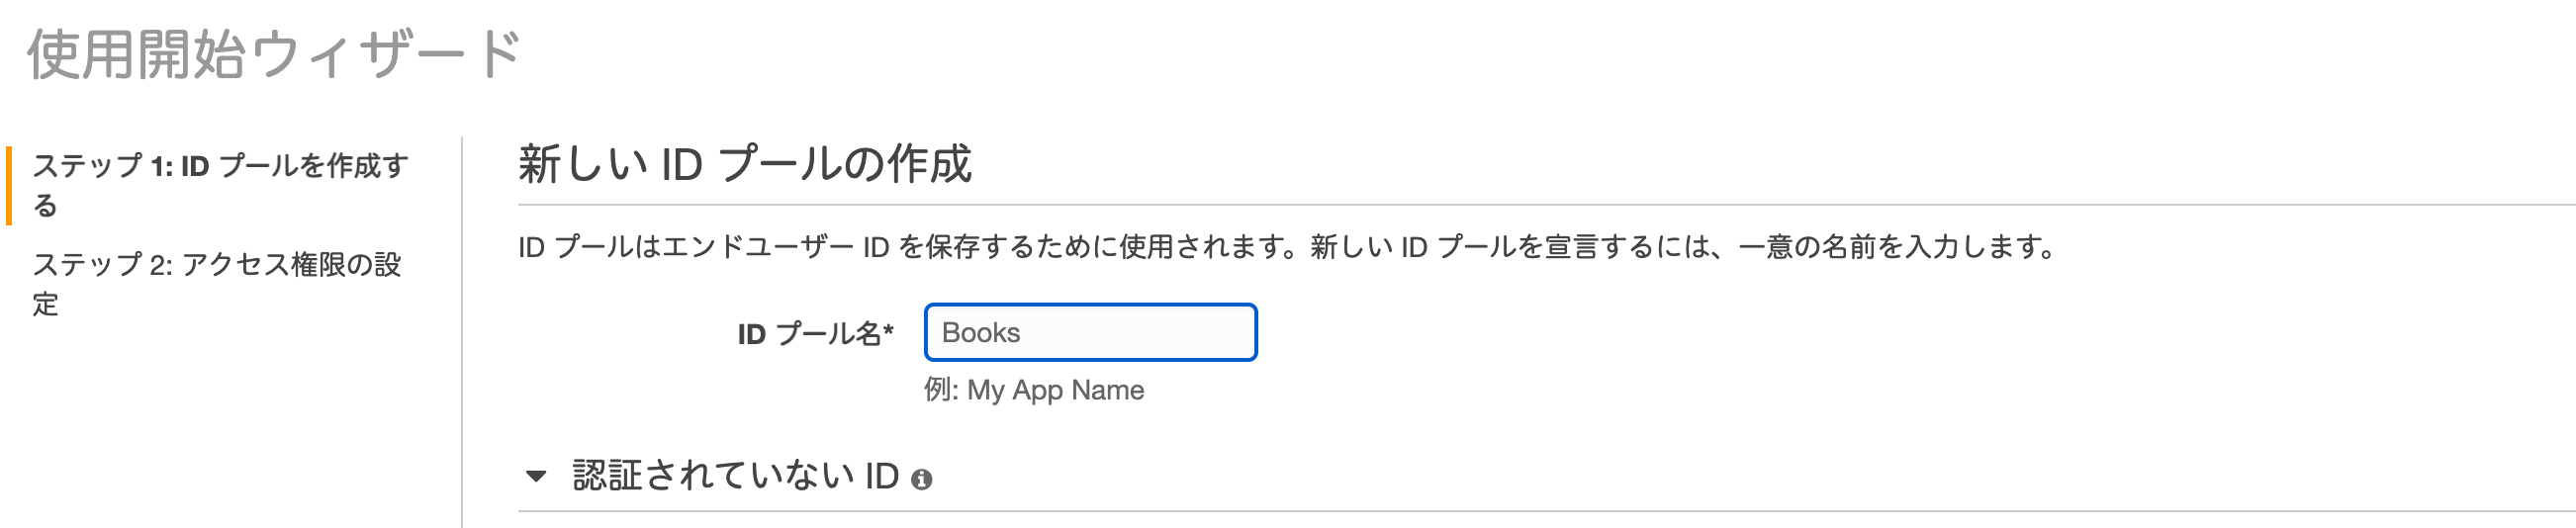
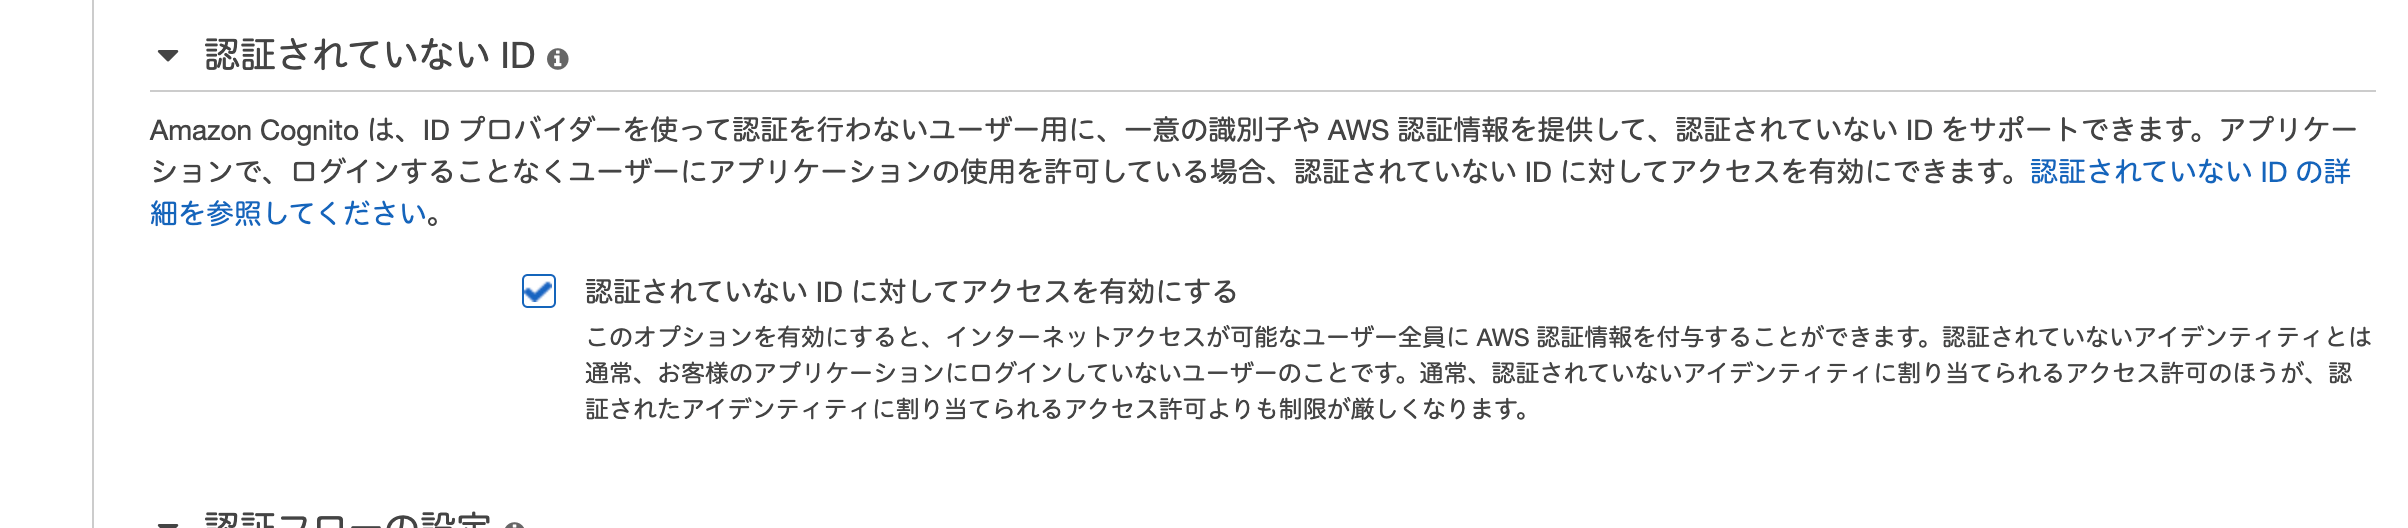
認証されていない ID にチェックを入れます。
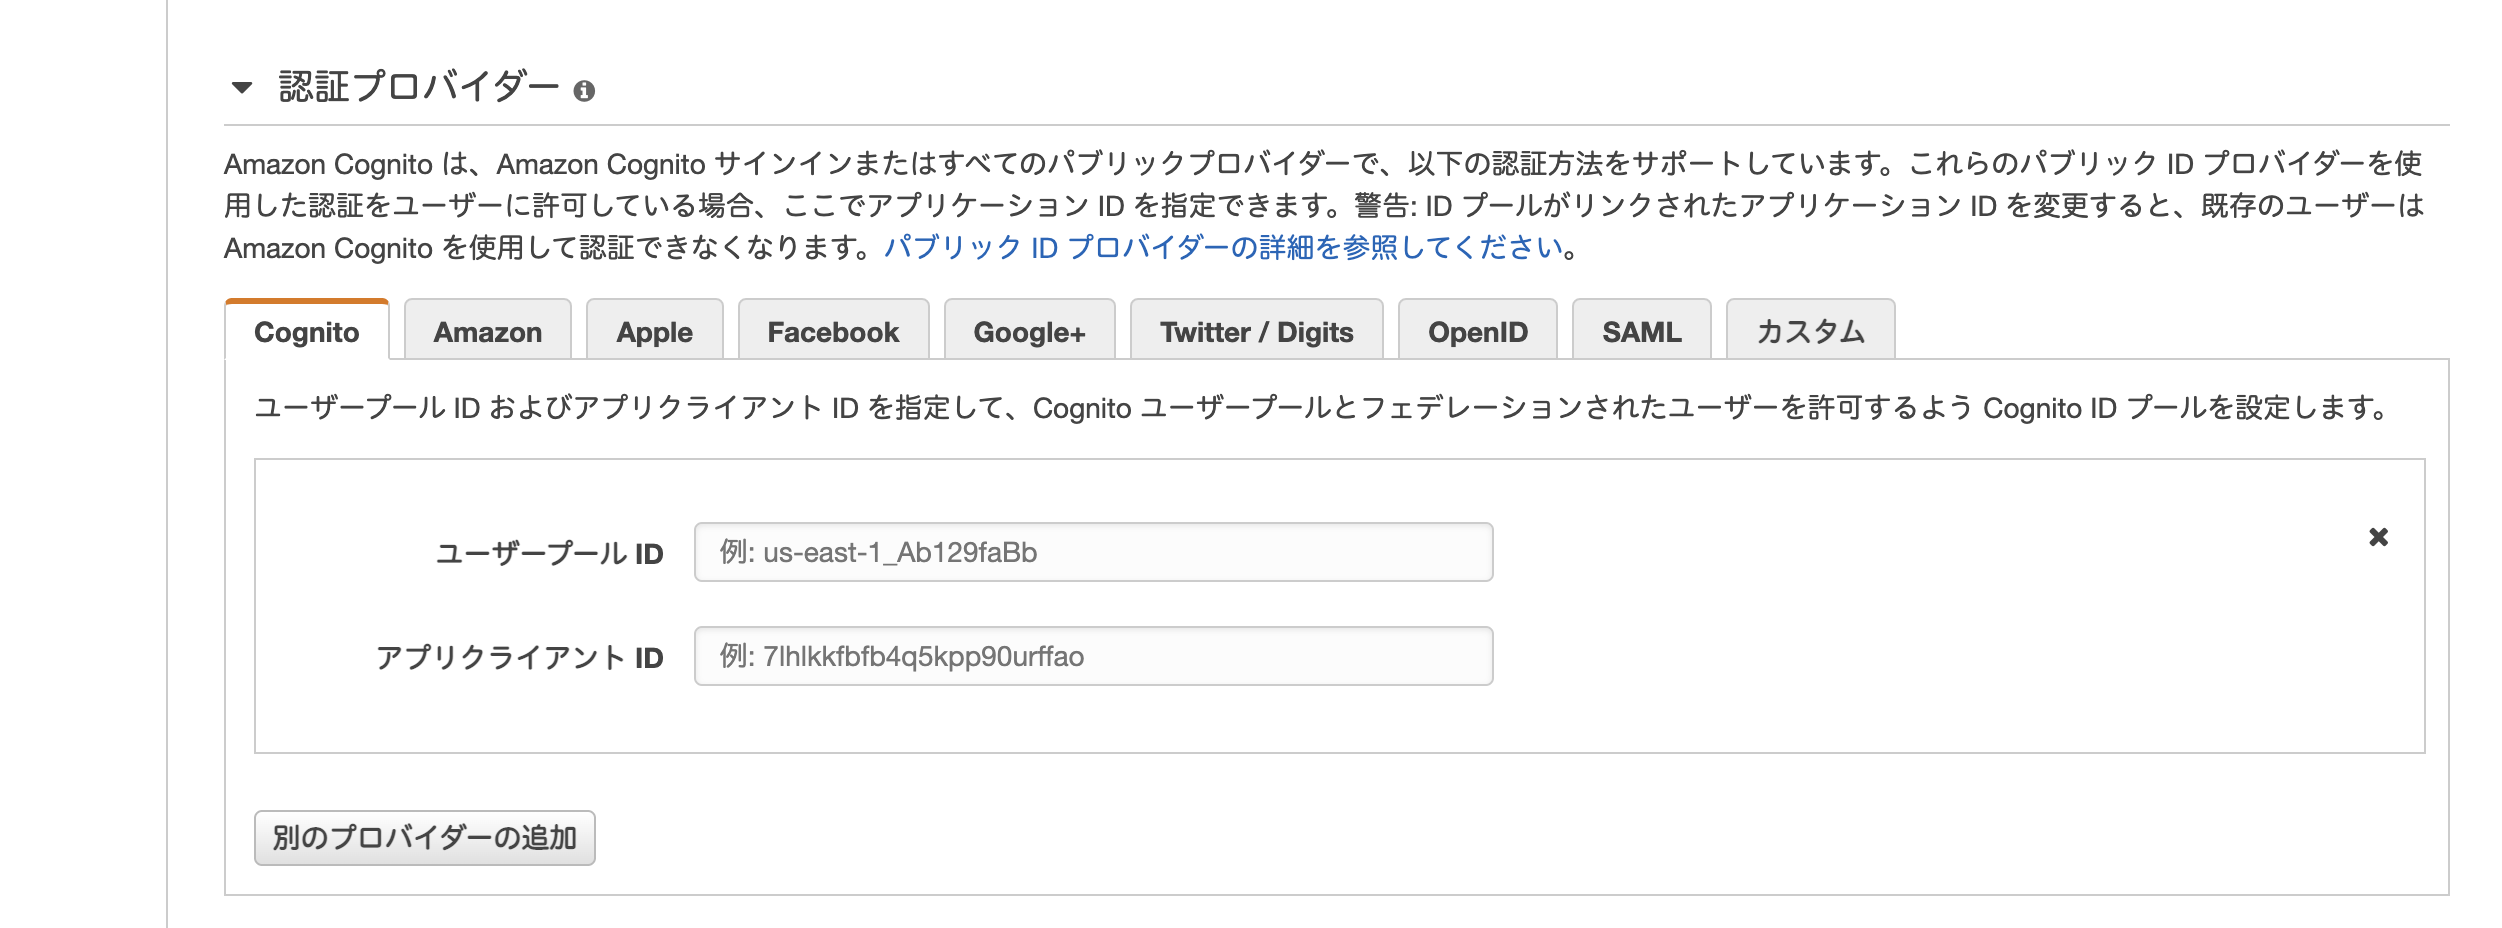
認証プロバイダーをクリックし、Cognito のユーザープール ID とアプリクライアント ID を入力します。
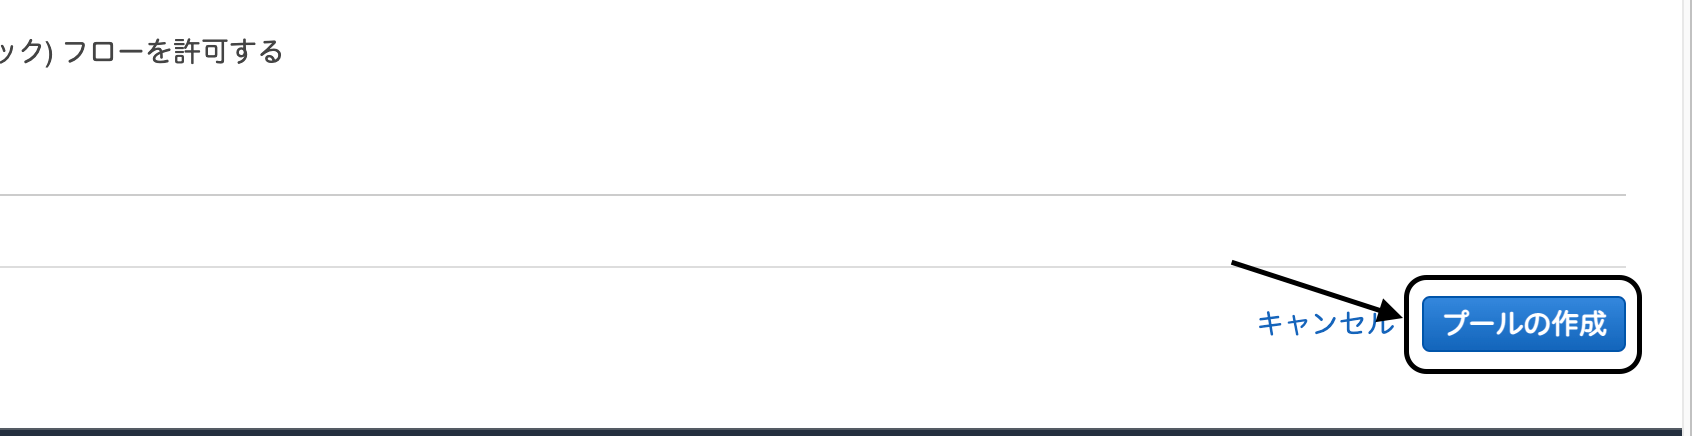
『プールの作成』をクリックします。
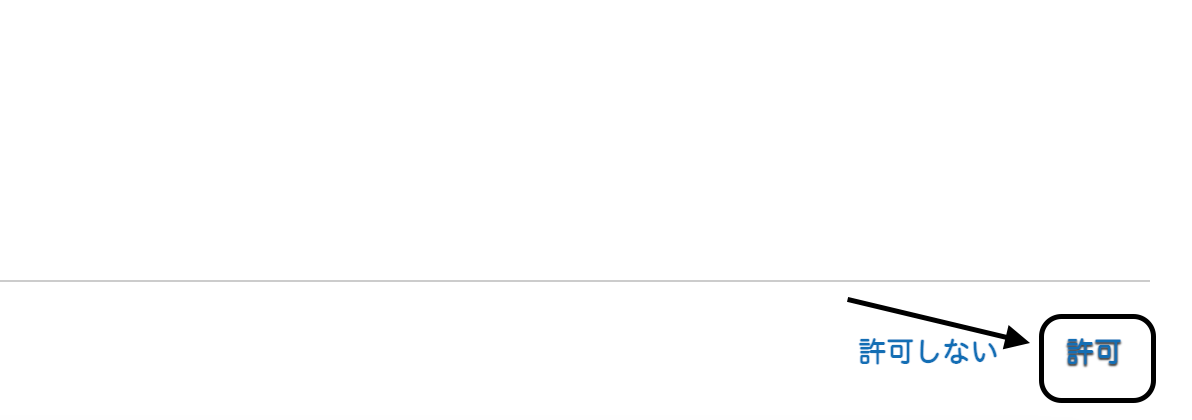
『許可』をクリックします。
Amazon Cognito での作業開始画面へ遷移しました。
プラットフォームを JavaScript へ変更します。
IdentityPoolId が必要になるので、値をコピーします。
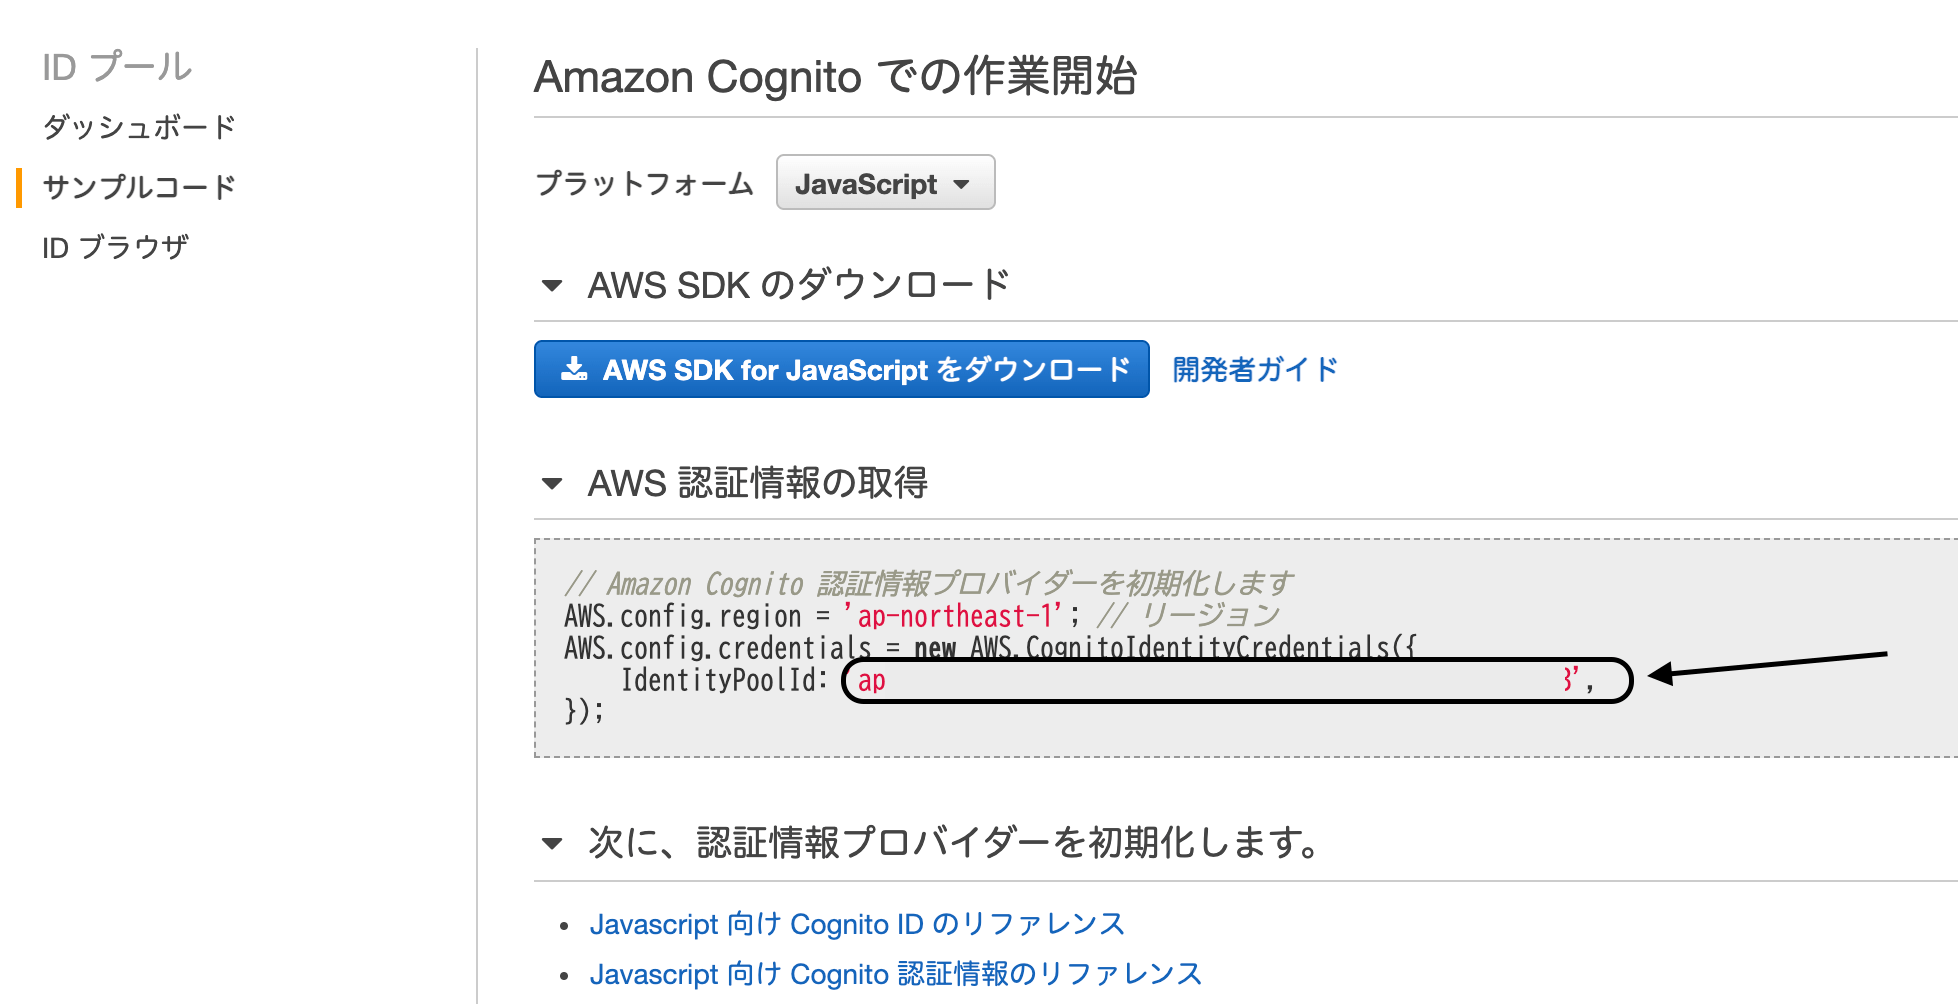
コードエディタに戻って、CognitoIdentityCredentialsを設定します。
<IdentityPoolId>には、先程コピーした値を貼り付けます。
<リージョン>には、AWS.config.regionの値(ap-northeast-1)を貼り付けます。
<UserPoolId>には、上部に設定したpoolDataのUserPoolIdを貼り付けます。
credentialを更新します。
更新が成功した場合は、トークンを返し、失敗した場合は、エラーを返すようにします。
一通り完成したので、フォームで確認しましょう。

『送信』ボタンをクリックし、Console で確認すると、
トークンが返ってきました。
全文は、以下の通りです。
お知らせ
私事ですが、Udemyで初心者を対象にしたReactの動画コースを作成しました。
Reactについて興味がありましたら、ぜひ下のリンクからアクセスしてください。
詳しくはこちら(Udemyの外部サイトへ遷移します)